Showing posts with label celery. Show all posts

Tuesday, June 26, 2012

Roasted Tomato Soup ~ Served Hot or Cold

Hot or Cold, Roasted Tomato Soup

This is a robust savory soup served hot or cold.  On this occasion, I served it hot for lunch.  The garden is overloaded with tomatoes!  Two varieties of Heirlooms, Celebrity, Roma and small Cherry tomatoes bursting with flavor.  Basil, yes, we have tons of that too!  Perfect for our delicious soup and easy to put together.

Roasted Tomato Soup, Served Hot or Cold,
adapted from CIA Master Chefs
The Chef In My Head
Yields 8 cups

12 fresh tomatoes, any variety, quartered
4 T extra virgin olive oil, divided use
2 tsp kosher salt, divided use
1/2 tsp fresh ground pepper, divided use
2 large onions, rough chopped
2 stalks celery, rough chopped
4 garlic cloves, 2 peeled rough chopped, 2 whole
4 C vegetable broth
1/4 C dry white wine
1 bay leaf
1/4 C fresh basil, chopped + more for garnish

Place tomatoes along with 2 whole garlic cloves on baking sheet, drizzle with 2 T olive oil and sprinkled with half of salt and pepper.  Roast in 450 degree oven about 30 to 45 minutes until they are browned and have a rich, roasted aroma.  Set aside.

Heat the remaining olive oil in a soup pot over medium heat.  Add the onion and celery and saute, stirring frequently until the onion is translucent, 5 to 7 minutes.  Add the remaining garlic and the bay leaf and saute for 2 minutes.  Add the roasted tomatoes, the remaining salt and pepper and roasted garlic along with the broth and white wine.  Scrape the bottom of the pot to deglaze.  Bring to a boil, then reduce the heat and simmer until the vegetables are tender, about 30 minutes.

Remove the soup pot from the heat and discard the bay leaf.  Carefully pour contents into the awesome Vitamix and add the basil and secure the lid.  Turn on machine on and quickly increase the speed to Variable 10, then to high.  Blend for 45 seconds until smooth.   Note: If you do not have a Vitamix yet, then you can use your food processor or blender, blending in smaller batches. 

If serving HOT, pour into serving cups or bowls, garnish with reserved basil sprigs.  

If serving COLD, chill the soup for at least 4 hours and up to 24 hours.  Check for seasoning just before serving.  Pour into cups or bowls and garnish with basil springs.

Enjoy!

Delicious with crispy garlic croutons or my favorite, a rustic Grilled Cheese Sandwich!

post signature

Print this Recipe

Sunday, June 24, 2012

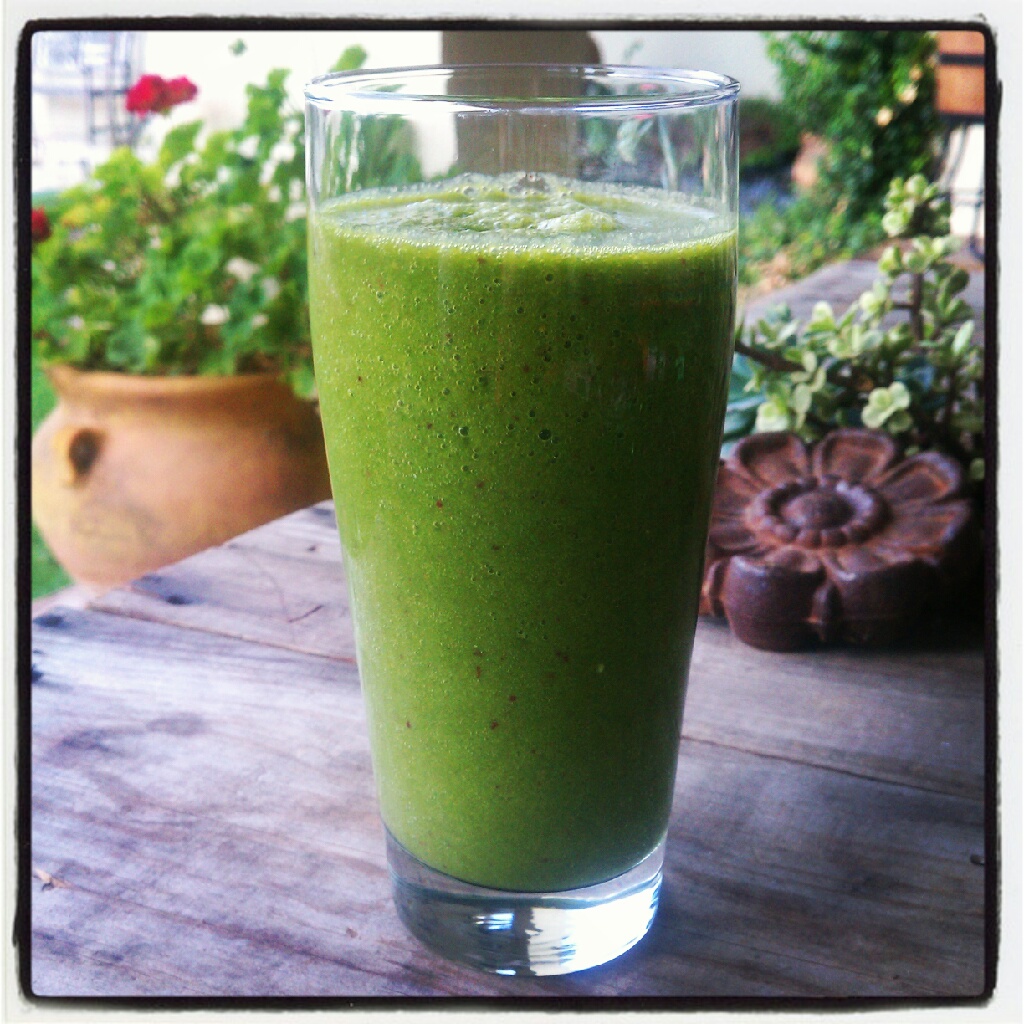
Glowing Green Smoothie


Drinking the Glowing Green Smoothie (GGS) is a great way to incorporate tremendous amounts of greens into your diet – far more than just eating your veggies. A serving of the GGS contains over 3 cups of dark leafy green vegetables, which is more than many people get in a week!
Greens have more valuable nutrients than any other food group on the planet. You might be surprised to learn that greens even have high-quality, easily-assimilated amino acids – enough to build the protein that supports the muscle mass of the mighty, greens-eating gorilla, which pound-for-pound is the strongest animal on earth!
Blending helps make greens’ full spectrum of nutrition readily available to the body. Nutrients are encased inside plant cells and getting their benefits requires these cells’ walls to be ruptured. Greens need to be worked down to a creamy consistency, but most people simply don’t chew that much! Blending addresses this problem, helping your body absorb the maximum amount of nutrition from your greens.
This is the drink that I drink every day, and have all my clients drink to feel and look their best. I hope that it will become part of your daily life as well.
I generally recommend starting out consuming around 16 ounces of the Glowing Green Smoothie, and then working up to 24 ounces or more. A Vitamix blender is definitely recommended to make this smoothie, so that it’s smooth, silky, and delicious in only a few minutes of prep time and cleanup.
The advantage of making a big batch like this one is time and convenience. Unlike juice, the Glowing Green Smoothie will keep in your refrigerator, as long as it’s covered, for about two and a half days. You can share it with your family or roommates, or have it yourself over that time period. You can also freeze portion sizes of it in glass containers and thaw out the night before in a bind.
Ongoing cleansing is a critical way to reach your highest potential of health and beauty. The Glowing Green Smoothie retains all of the fiber of the greens and fruit, rather than removing it. In nature, vegetables and fruit are found with both their fiber and juice intact, and we can’t improve on nature. Fiber is critical for ongoing cleansing by sweeping out toxins on a regular basis, helping to keep your digestive tract and body clean, and also keeping you more full so that you tent to eat less heavier and/or acidic foods throughout the day.
Note: I encourage you to mix and match your greens and fruit. Vary this recipe with kale, chard, arugula, and the like. Just avoid melons, as they don’t combine well with other produce.


I encourage you to peruse her website, it is 
loaded with healthy goodness and valuable information!!


Glowing Green Smoothie (R)
The Beauty Detox Solution
Ingredients (64 ounces / 2-4 servings)


1 ½- 2 cups very cold, filtered water
6 cups spinach, chopped (I used kale)
5 cups organic romaine lettuce, chopped
2 stalks of organic celery (I used several of the tender baby stalks)
1 organic apple, cored and chopped
1 organic pear, cored and chopped
1 organic banana
1–2 Tbs. fresh organic lemon juice
Optional Ingredients
Ice cubes (the extra coldness can help newbies with the taste)
1/2 cup of organic cilantro
1/2 cup of organic parsley
Directions
Add water, spinach and chopped romaine to the blender. Starting the blender on a low speed; mix until smooth.
Gradually move to higher speeds and add the herbs, celery, pear, and apple. Add the banana and lemon juice last.


*For 1 serving, cut out one of the fruits and the celery.
Remember, your overall diet and lifestyle, and how you are cleansing out waste regularly are critical to you getting the results you want. You can’t just drink the GGS and expect maximum results…Be sure to read The Beauty Detox Solution to learn the entire program! It includes the crucial information to understand how to eat for beauty, as well as recipes, meal plans, and much more.


That's right, you guessed it....the Vitamix is on it again!!!


post signature

Print this Recipe

Sunday, December 20, 2009

Navy Beans - Thick and Hearty


I admit it I'm getting lazy lately.  These were too easy (after the propane tank was refilled - woops).    After two days on the stove they are just right.  Thick and hearty comfort food.  A nap is next on my agenda.

Super Easy Navy Beans

1 (16 ounce) pkg dried Navy Beans
1 (4 ounce) piece of Salt Pork (great with leftover holiday ham bone)
1 Onion, medium dice
4 stalks Celery, medium dice
3 cloves Garlic, finely diced
2 tsp. dried Thyme (or 5-6 stems fresh thyme)
1 Bay leaf
Salt & Freshly gound pepper
4-6 Cups Chicken Stock (not broth)

Pick through Navy beans for small rocks or debris, rinse and drain.  Combine all ingredients in a large heavy stock pot.  Bring to a rolling boil for approximately 2 minutes.  Run out of propane, let rest for at least an hour while you get tank refilled.  You actually need to let them sit for at least an hour before beginning to simmer. Bring pot back to boil then reduce to simmer.  Simmer, covered, for at least 3 to 4 hours. Better if refrigerated overnight.  Reheat and bring to simmer uncovered.  Discard Salt Pork. Break up some of the beans with the back of your spoon if you like to help thicken.  Serve steming hot in front of a great fooball game on TV.

Print this Recipe

Tuesday, September 29, 2009

We Rolled Away From The Table

I'm not eating again for at least a week.  So good and deliciously rich.


 Blackened Mahi mahi with fresh Crab, Shrimp and Bay Scollops with Bearanaise Sauce
4 Mahi mahi steaks about 1/2 pound each
1/4 C butter + 2-3 Tbl for coating fish
approx 3 Tbl Tony Chachere's seasoning, or your favoite cajun seasoning
1/4 C dry white wine
Juice of one lemon + 1 tsp grated lemon rind
2 cloves garlic, minced
1 bunch chives, finely minced
1 Tbl fresh tarragon, roughly chopped
1/4 tsp cayenne
3/4 pound medium shrimp, peeled and devined
3/4 pound bay scallops
8 oz lump crab meat
1 recipe basic Bearnaise Sauce (you can use a package in a pinch)


Rinse and dry Mahi mahi steaks.  Spread 2-3 Tbl butter on steaks to coat both sides, season liberally with Tony's seasoning on both sides.  Heat dry/clean large cast iron skillet frying pan on high until smoking hot.  Once pan is very hot, lay filets down carefully and cook for approx 4 minutes on each side until cooked through, do not overcook, you want the fish to stay moist.  Set aside and keep warm.


Please note:  This will smoke ALOT, you need good ventilation.  If your skillet is seasoned well and hot enough your filets should not stick. 


To prepare sauce, in a separate large skillet melt butter on med-high heat, add tarragon and saute garlic until soft, do not brown.  Add lemon juice, white wine and cayenne. Cook until reduced by half to concentrate flavors.  Add shrimp and scallops, saute until just cooked through, do not overcook.  Add crab, 1/2 of chives and lemon rind, heat until warmed through.  Combine with prepared Bearnaise Sauce.


To serve, transfer filets to warm plates.  Ladle sauce over each filet, garnish with chives and serve.


I served this with Wild Rice/Wild Mushroom Pilaf and Steamed broccoli with lemon and butter.


Wild Rice/Wild Mushroom Pilaf


1 C. wild rice prepared to package directions
1 C dried wild mushrooms, hydrated
1/2 C celery, diced
1 small onion, diced
1 lg clove garlic, minced
2 Tbl butter
3 Tbl Teriyaki Sauce


Just before rice is ready, melt butter and saute, mushrooms, celery, onion and garlic until softened.  Add Teriyaki sauce and continue to saute until almost all of liquid is absorbed.  Add mushroom saute mixture to wild rice and toss together lightly and serve.  Serves 4


Print this Recipe